Amazon have recently enabled access for developers to send push notifications to users through Alexa. I’ve been waiting for this for months, because there was a particular use case I wanted to work on.
The idea is a straight forward one. A person has a button – in this case an AWS IoT button. The button is pressed, and a notification is sent to a specific user’s Alexa devices informing them that help is required.
Notifications such as this one aren’t sent to a device, but to a user, so any device that is bound to that account will activate when the notification is sent – making the notification more accessible than having to have your phone nearby all the time. Push notifications are enabled per skill, and whether or not the alert is audible can be determined per device, so there’s a lot of options.
Here’s a video showing a simple example of what happens. Then we’ll start looking at how to wire this up.
If you have trouble with the embedded video – here’s a link of the video on dropbox
There are several steps to get this working as expected, and we’ll tackle each in turn. Here’s a high level flow of what we have to wire up.
Assumptions
This article assumes you’re working on a .NET Core Alexa skill using the <a target="_link href="https://www.nuget.org/packages/Alexa.NET/">Alexa.NET Nuget Package
Sending a push notification from your skill to the Echo
Huh? Push notifications first? Yes, definitely, for this example it’s easier to work back from the end result – as once you have a working push notification, you’ll be able to more easily identify if the previous step in the process was correctly wired up.
Push notifications are performed through a separate Amazon API – but to work they require the API token sent as part of the skill request payload. This token is set up for the correct user,
with the permissions accepted by that user for your skill. We need to ensure the skill can get permissions regarding push notifications.
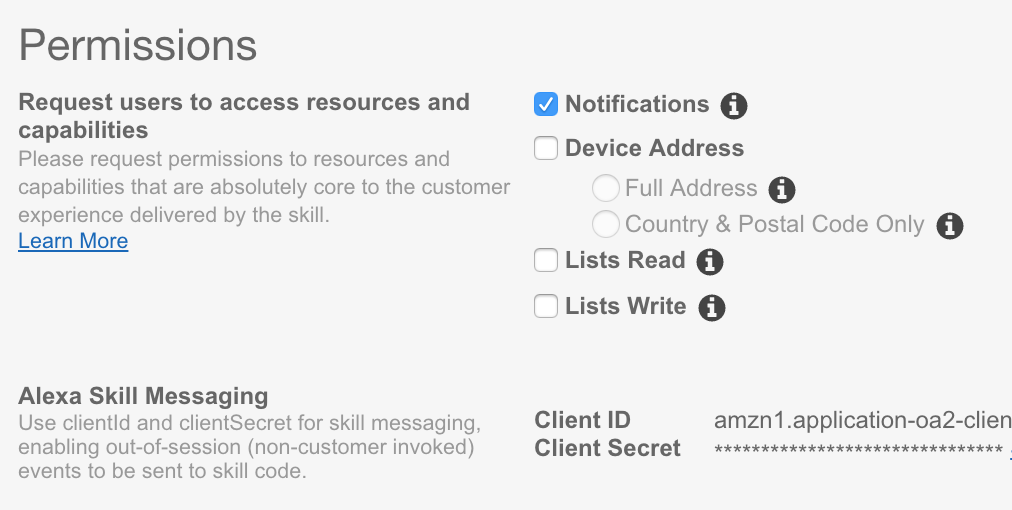
This is done by accessing the skill permissions within the Configuration tab of your Alexa Skill
As shown in the image, when you select permissions you receive a client ID and secret. Don’t worry about those yet – they come later.
Issue regarding permissions
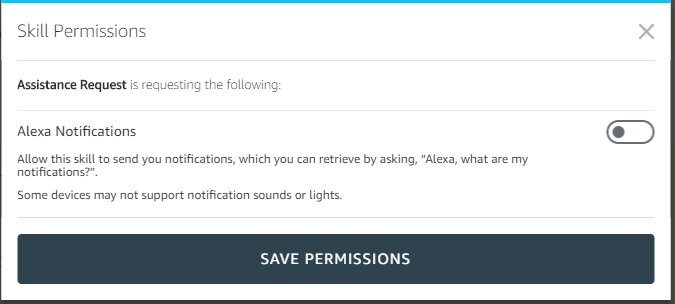
So now you have the correct permissions set up, the user will be expected to enable those permissions when the skill is first enabled. They’ll receive a screen like this
You see that the permission toggle is there – but save isn’t disabled. Your skill can be enabled without the correct permissions. Permissions may not be enabled, they may be revoked etc. It’s too off-topic for this blog post, but ensure you’re capturing errors and handle not being authorised appropriately.
Send a notification
A notification has to have several things to work correctly
- A spoken message
- A short written message (to display when required)
- A reference, unique to your skill
- The period of time you wish the notification to be available
Once you have this information, add the Alexa.NET.Notifications library to your project, and add the code below.
This code is suitable for a skill working in the US. If in Europe then the endpoint will have to change to NotificationClient.EuropeEndpoint, and you’ll have to add the language appropriate locales (according to the docs the notification should always have en-US).
If you invoke your skill (I use launch intents because they’re the simplest) then this code should send a notification to your account every time it’s launched. You’ll notice there’s a DateTime field being used as the last parameter, that’s how long the push notification is relevant. After this time the notification will expire and not show up on your echo devices
var client = new NotificationClient(
NotificationClient.NorthAmericaEndpoint,
input.Context.System.ApiAccessToken);

var display = new DisplayInfo();
display.Content.Add(new DisplayContent {
Title="Assistance Requested",
Body="Assistance has been requested",
Toast = new ContentItem("Someone needs help"),
Locale = "en-US" });

var spoken = new SpokenInfo();
spoken.Content.Add(new SpokenText("en-US", "please help"));

var reference = "messageuser-" + DateTime.UtcNow.ToString("yyyyMMddHHmmss");

var notify = await client.Create(
  display,
  spoken,
  reference,
  DateTime.Now.AddSeconds(30)
);
Setting up Skill Messaging
So once the skill has been proven to send notifications, we can narrow it down to only send them when we receive an appropriate request from our IoT device. For this we’ll be using Skill Messaging
The idea behind Skill Messaging is any internet connected code can send a payload to the Skill Messaging API, a separate API from Amazon, asking for a payload to be sent to your skill on behalf of a particular user ID. The request is authenticated by a token bound to your skill – so if the user specified has that skill enabled then the skill receives a new Request type of Messaging.MessageReceived.
We’re going to change our skill so that whenever we receive a skill message, it triggers the push notification
Accepting message requests in your Alexa Skill
The latest Alexa.NET at the time of writing (1.4.2) has the ability to extend the types of request that SkillRequest can handle. When you add the Alexa.NET.SkillMessaging Nuget Package we can add Messaging.MessageReceived support with the following code. For Lambda you add this to the function constructor, if you’re running a Web API then add it to your startup code.
RequestConverter.RequestConverters.Add(new MessageReceivedRequestTypeConverter());
This then means we can wrap our push notification code in something like this
switch (input.Request)
{
  case LaunchRequest _:
    //launch request handling
    break;
  case MessageReceivedRequest messageRequest:
    //TODO: Put push notification code here
    return ResponseBuilder.Empty();
}
The message request should be treated like any other skill request, so returning an empty – but successful – response is fine.
Triggering the skill message
So now we’ve limited the push notifications to valid skill messages – we’ll create a second Lambda function. This one will trigger the skill message whenever it’s invoked.
Security Note – User ID
Before we start, a quick word on our use of User IDs in Alexa skills.
For this example, I’ll be referencing an environmental variable for the user ID, this is because I only want to send messages to a single user ID – you can find out your user ID for a skill by logging SkillRequest.Context.System.User.UserId in your SkillRequest object from your Alexa Skill when it’s invoked.
An Alexa User ID is generated each time the user enables your skill. If you disable and re-enable your skill, you’ll get a new User ID. How you maintain the correct user IDs is outside the scope of this article. That said – I’d recommend looking at Alexa Account Linking and, for extra fun, The Skill Enabled/Disabled Skill Events
or, ya know, let me know that it should be my next blog article 😉
So, anyway
Spin up a new Lambda and paste in the following function code
var alexaClient = System.Environment.GetEnvironmentVariable("message_client");
            var alexaSecret = System.Environment.GetEnvironmentVariable("message_secret");
            var userId = System.Environment.GetEnvironmentVariable("userId");

            var accessToken = new Alexa.NET.AccessTokenClient(Alexa.NET.AccessTokenClient.ApiDomainBaseAddress);
            var token = await accessToken.Send(alexaClient,alexaSecret);

            var messages = new Alexa.NET.SkillMessageClient(
                Alexa.NET.SkillMessageClient.EuropeEndpoint,
                token.Token);

            var messageToSend = new Alexa.NET.SkillMessaging.Message(
                new Dictionary<string, string>{ {"test", true.ToString()} },
                300
            );
            var messageId = await messages.Send(messageToSend,userId);
            Console.WriteLine(messageId);
So as you can see this grabs a few values from the environmental settings of your lambda: The Client ID and Secret you can take from the permissions section of your skill config, we mentioned them earlier. The User ID you grab from your skill as above for testing, or however you plan to map these accounts.
Once you have this information place them in the environmental variable section of your lambda
Then we have two steps
- We use the client and secret to retrieve an access token we can use with skill messaging
- We use that token to send a json payload (in this case just a test property with the value of true) to the skill,
on behalf of your user ID
The 300 is how long in seconds the message has before it expires. As in our example both parts of this process are lambdas, this doesn’t need to be very high. If you were running it via an API on your own hardware and it might have problems etc, tweak accordingly. Amazon will keep trying the message until it expires or gets delivered.
Please note we’re assuming all skill messages lead to the same notification, as in this example they do, that might not always be the case. You might want to infer some information from whatever invokes your skill message and send that to your skill – altering the message
For example, although not part of this specific post, IoT buttons have different ways they can be clicked (single, double, long press) and we could send that as part of the JSON payload to change the message depending on what they selected
So that’s the skill message. You can invoke this directly within AWS as a test and you should see that within a second or two your notification gets triggered on your Alexa device
So we have the skill message, and the notification. Now the final part of the puzzle – wiring up the IoT button via AWS IoT!
Wiring up our AWS IoT Button
This part of the process is pretty straight forward, mainly because Amazon have made it so easy to wire up an IoT Button to an existing Lambda
When you get the device you’re asked to install the AWS IoT Application from the Google or Apple stores. Once you have the app installed, you’ll have to log in to your AWS account and then register your IoT button and link it to the WiFi.
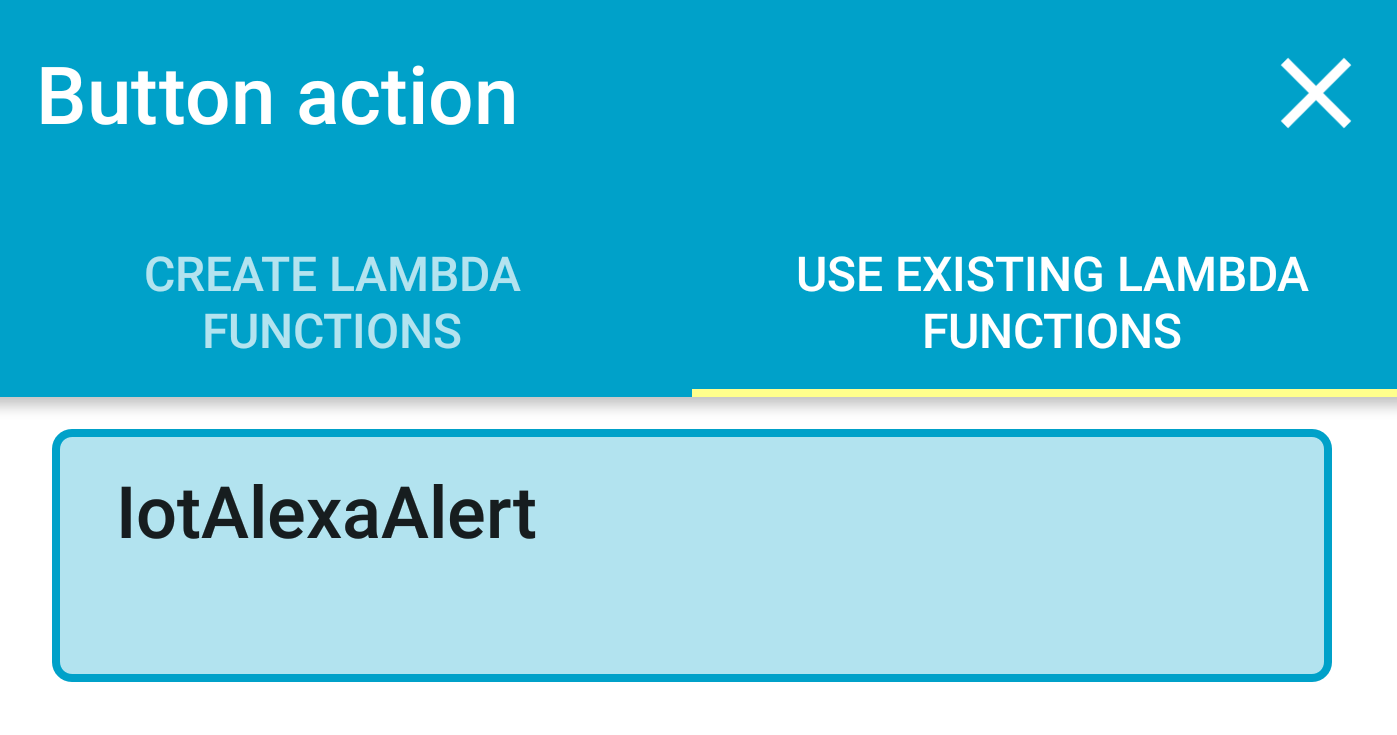
The app guides you through all this, once you’ve registered you’ll be asked if you want the app to set up the necessary infrastructure for you, and you’ll see a screen like this one – which allows you to decide what should be executed when you click the button
As you can see, you can select a list of your existing lambdas, and you just pick the skill messaging Lambda we picked up earlier!
I know – I bet you thought this would be the super tricky part, right? I know I did. But Amazon have made all this incredibly easy to get ready.
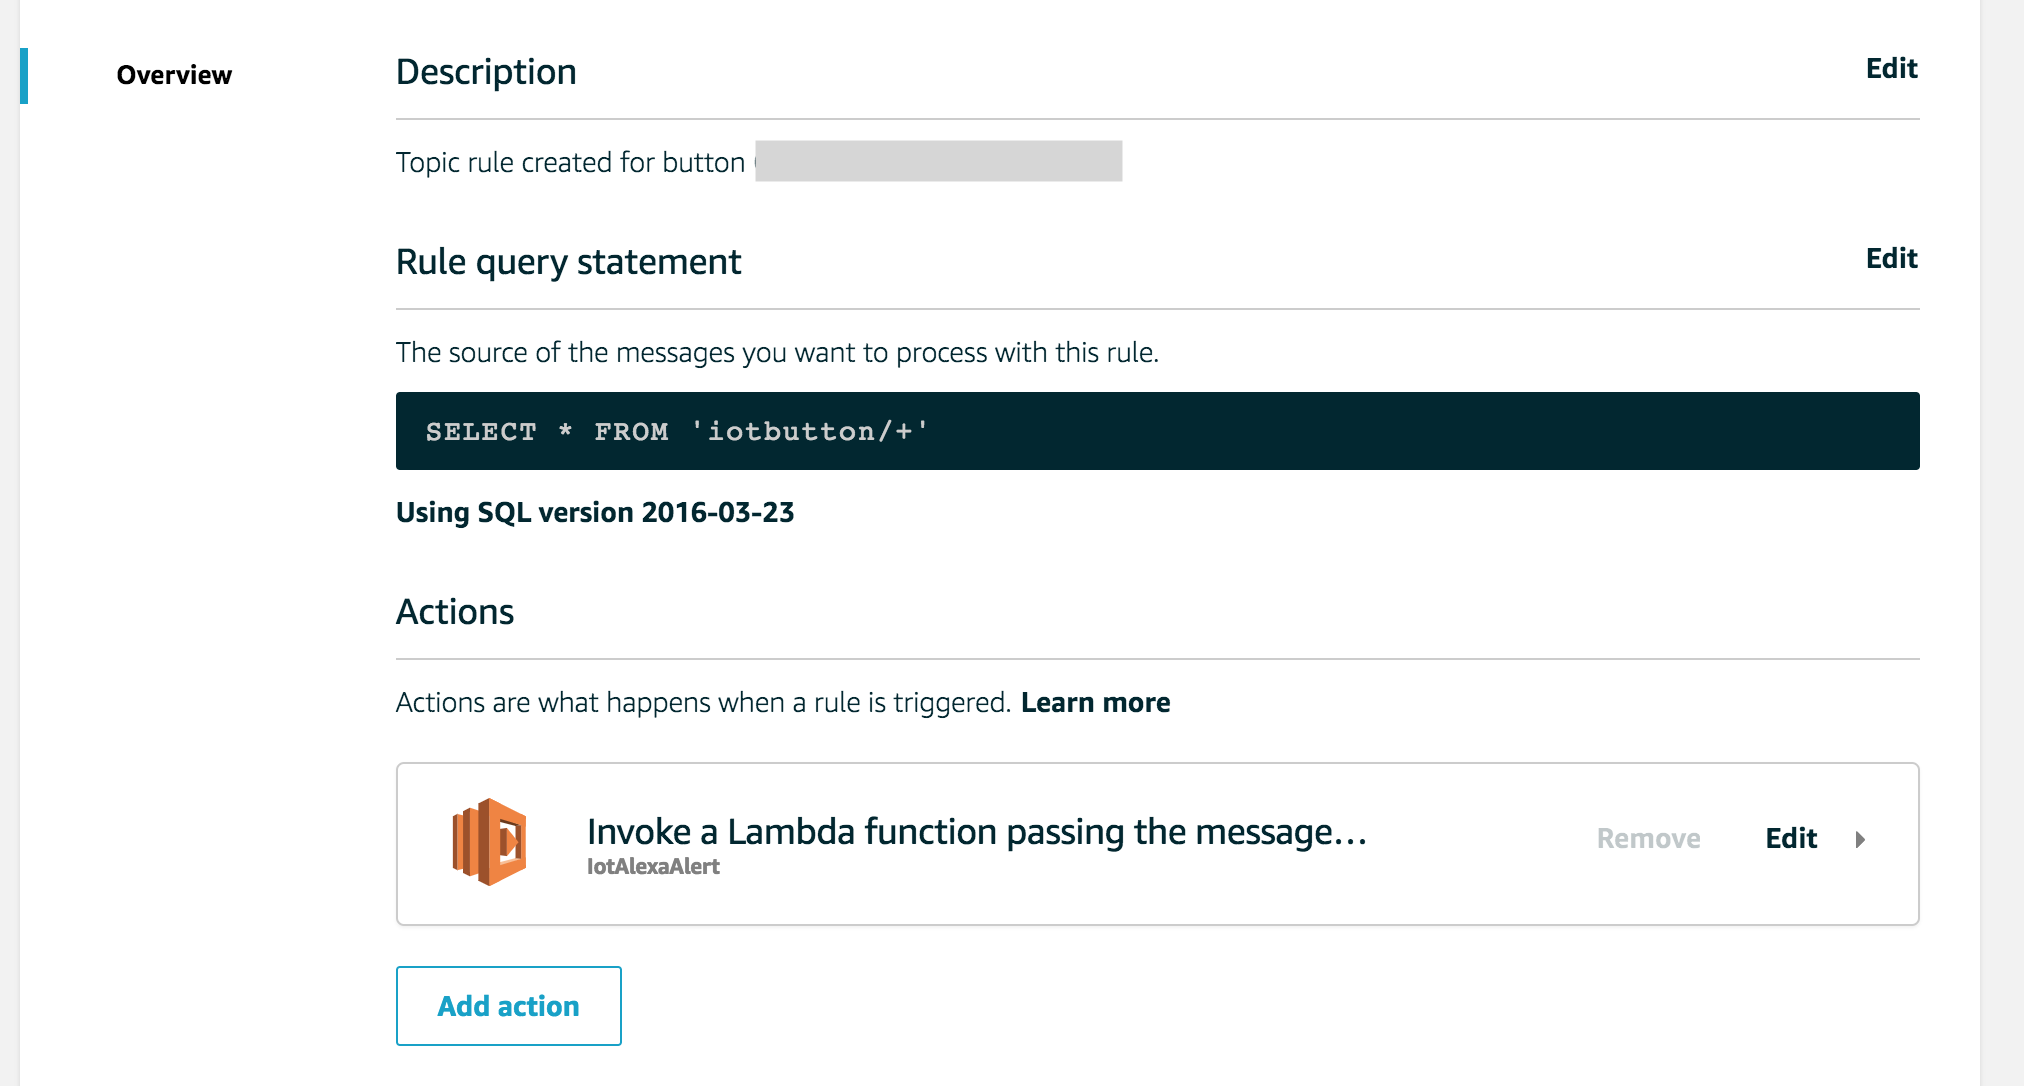
Behind the scenes what they’ve done is registered your button within the IoT section of your account
Then they created a topic and assigned an action for any messages placed on it to trigger the selected Lambda
The messages sent from the IoT device, your button, are put in that Topic. The rule they created means each message will trigger the skill messaging lambda
The skill messaging lambda will send a message to the skill, which in turn will actually generate the push notification and sent that to your echo devices.
All that in under a couple of seconds! I know, it’s amazing what you can do
A simple example
Don’t get me wrong – this is just the beginning, hopefully this shows you what you can do with a little knowledge and understanding. But more importantly I hope it gets you thinking about the possibilities
What if you had a button for a specific room, so dependent on the button altered the message that you sent?
Remembering that this is all around wifi rather than location – how cool would it be if you had an IoT button that just simply sent someone an Alexa notification “I’m thinking of you right now” while you were at work and unable to talk?
What if an elderly relative could press on the button and Alexa let you know they needed you to grab some shopping for them?
How incredibly hard can it be for someone struggling to dial and say “I’m lonely”? How much easier is it to just press a button and have that message sent without having to try and form the words?
That’s one I’m thinking of at the moment. How much would it take to make something someone in that situation could sign up for on a good day? A site or an app their friends could sign up for just by following a link. When they want to hide and not talk…
…could they maybe just press a button instead?


